Thursday, August 25, 2011

Bacon Green Beans & Grilled Chicken with Creamy Mushroom Sauce

The recipe alone is a mouthful but let me just tell you this was AMAZING!!! It is a bit time consuming but worth every moment spent preparing it! Now, normally when I make fresh green beans I make them the way my sister taught me, in a pan with shallot and garlic and it's divine!!! However, I think it's like a law somewhere that bacon only makes things better so I got creative here. And it was a fantastic call, trust me, the way the bacon just crisped up with the onion and perfectly coated those green beans -heaven!!! As for the chicken with mushroom sauce - I cant really explain this one other than I found myself compelled to purchase these mushrooms at the commissary this week and have been dreaming about this creamy mushroom sauce for days now. Basically this is super low-carb and yet packed full of flavor! (Dont worry, I also baked peanut butter oatmeal cookies so that there were carbs somewhere in my home haha! That recipe will be the next post, promise!) Ok now that you're salivating over this amazing dish...let's cook!

Recipe:

Green Beans

1 lb fresh green beans
1 tbsp butter
1/2 cup onion, diced
4 strips of bacon, cut into 1/2" pieces
dash of garlic salt


Creamy Mushroom Sauce
1 tbsp butter
1/2 cup onion, diced
10 mushrooms, sliced
1 tbsp butter
1 tbsp flour
1/4 cup of milk
3/4 cup of sour cream
dash of salt and pepper to taste


Chicken
2 breasts of chicken
salt and pepper
2 tbsp olive oil

Directions:

Start with the green beans! Cut the stems off the top and bottom of the green beans and rinse under cool water. Bring a pot of salted water to a gentle boil and toss in the green beans. Cook for about 8 minutes or so - you don't want them mushy, just a little less stiff. Drain the green beans and set them aside in a bowl of cold water to stop them from cooking any longer. In a medium frying pan melt the butter and add the onions and bacon. Cook the onion and bacon for about 10 minutes - basically until the onions are translucent and the bacon is about halfway cooked. Toss the green beans into the pan and cover them with the bacon and onion mixture. Stir the mixture every few minutes or so to keep the green beans coated, they're ready when they're cooked to your liking texture wise!

When the green beans have been removed from the salted pot of water you can start the chicken. Lightly salt and pepper the chicken and toss it in a pan with the olive oil. Turn the chicken every few minutes so that the outside becomes golden brown. Depending on the thickness of the breast it may take anywhere from 10-20 minutes to cook the chicken, so just keep turning and keep an eye on it. I totally cheat and stab it with a knife when I think it's ready - heck it's going to be smothered in a creamy mushroom sauce nobody will ever know that you stabbed the chicken to test it's "doneness".

The creamy mushroom sauce is a super easy. In another frying pan melt the butter. Add the onions and mushrooms and cook until the onions have almost lost their crunch and the mushrooms become golden brown. Scoop the cooked onions and mushrooms and set them aside in a bowl for a moment. Go back to the pan and add another teaspoon of butter and the flour - basically you're making a rue. Once the mixture is golden, probably about 3 minutes at most, add the milk and stir until the lumps are totally gone. Toss in the sour cream and continue to stir until it's really creamy. (If your sauce becomes too creamy feel free to add a splash or two of milk to loosen the consistency.) Toss the onions and mushrooms back into the pan and lightly salt and pepper to your liking. It is divine, I swear!!!

Pictures:

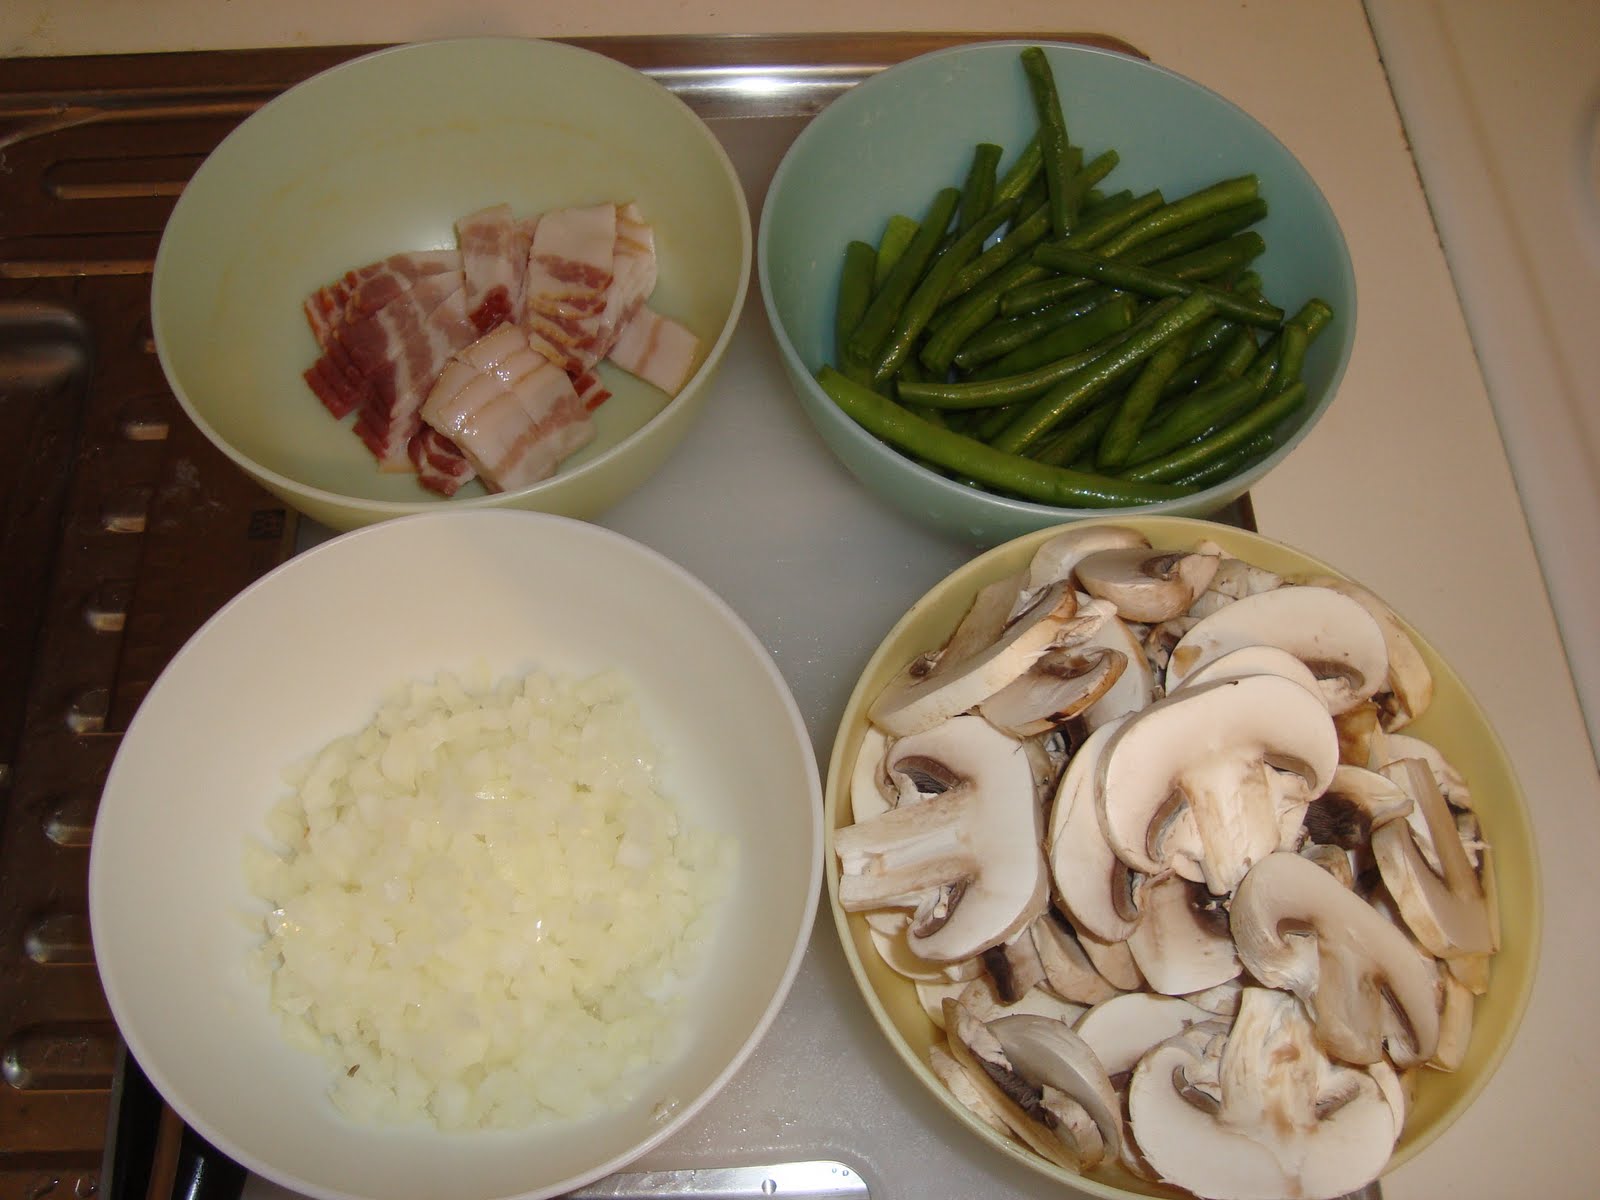
If you prepare everything before you start, all you have to do is toss as you read along :)

Turn the chicken breasts every 4 minutes or so to keep browning them without overcooking!

Bacon, onions, green beans = heaven!


And VOILA!!! Devour...

Spinach & Artichoke Dip

Alright - now I am on an artichoke kick lol! The ones from last night were so delicious that I decided we'd have them again tonight. Normally I make this dish for a party or a potluck or something fun but it's always delicious to just have for a snack night too! It's super easy, literally will take you 5-8 minutes tops to make, the rest of the time it's just browning up in the oven...ok now I'm salivating just thinking about it - let's go...


Recipe:


1 tbsp butter
dash of garlic salt
1 package of baby spinach
1 block of cream cheese - room temperature if possible
1 cup of shredded mozzarella
2 cloves of minced garlic
1/2 cup of sour cream
1 can of artichoke hearts - drained and chopped

Directions:

Preheat oven to 375 degrees.

In a large frying pan melt the butter. Once the butter is all melted and the frying pan is nice and hot add the spinach and garlic salt. Stir the spinach around so that it becomes wilted and well seasoned. It will go fast if your pan is hot enough so don't walk away here. Once it is all wilted, use a spoon and press the spinach against a side of the pan to drain the excess juice. Transfer the drained spinach to a bowl. Cube the cream cheese and add to the bowl. Add the mozzarella, sour cream, minced garlic and artichokes. Mix the ingredients until the mixture is creamy - top with a sprinkle of mozzarella if you have any left. Bake for 30-45 minutes - it will be bubbling and have a golden delicious top! Let it set for a few minutes, if you can bear to - I never have the willpower - then devour!

Pictures:

YUMMY!!!

Artichokes and Italian Meatballs

The other day Zach and I were having dinner and it dawned on me, now that I am pregnant again, I totally have to start eating better and healthier - BOO. Not that we eat horribly, just as you can see from all of these blog posts, our meals tend to be centered around the glorious carbohydrate! In an effort to find something still delicious and yet low to no-carb it dawned on me that it's been ages since we have had artichokes. Now normally they are a meal in themselves; however, I know that Zach would be hungry about 30 minutes after devouring his artichoke if I didn't prepare something additional  - hence the meatballs. These two dishes are super easy, but this will definitely take you a good 45 minutes to prepare both so make sure you have the time. Ok, let's go...


Recipe:

1 artichoke per person
1 lb ground beef
2 tbsp butter
1 egg
1 cup of breadcrumbs
2 tsp garlic salt
1/4 tsp pepper
grated parmesan cheese (optional)

Directions:

Take the artichokes and cut the stem off. Trim the tops of the artichokes about 1/4" so that the pointy tips no longer prick you. Place the artichokes in a large pot and cover with water. Lightly salt the water and turn the heat on medium-high. Cover the pot with a lid and let them cook for about 45 minutes. (You can check them after about 30 minutes, when they are ready the leaves will pull right off without much force.) For a dipping sauce I like to melt about 3 tbsp of butter and a sprinkle of garlic salt while Zach like to use 3 tbsp of mayo with a few hits of hot sauce - it just depends what you like!

After the artichokes have been cooking for 20 minutes you can start the meatballs. In a medium sized frying pan, melt the butter. Mix the ground beef, egg, breadcrumbs, garlic salt and pepper in a bowl by hand and shape into balls (you can also add a little grated parmesan cheese to the mixture if you'd like). Place the balls into the frying pan and cook for about 15 minutes. Note: you will need to turn them every 3-5 minutes so that they brown evenly, not char on one end and remain raw everywhere else lol). Once they're a golden brown all over they're ready!

Pictures:


Meatball Picture:
OOPS well I told you they were good, evidently they were so good that Zach and I devoured them without even remembering to take a picture lol

Monday, August 22, 2011

Sweet & Sour Chicken

Probably my second favorite thing about Chinese take out is the sweet and sour chicken, of course as noted earlier in this blog - egg fried rice comes first, always! However, there's something so delightful about pineapples and chicken that I just love. Now I will warn you that normally I kinda just don't LOVE veggies; however, they've started to grow on me and with the next 9 months on watch I have to make an extra effort to eat them however I can stand them. This dish is fabulous for getting some veggies that you might not normally use without really even tasting their 'veggie-ness' so to speak haha. I will also warn you that with the pineapple and the juice it is incredibly sweet - but oh so delicious. So if you like pineapples and don't mind spending about a half hour in the kitchen this dish is fabulous....

Recipe:


2 tablespoons vegetable oil
2 boneless chicken breasts, cubed
Salt and pepper
1/2 cup chopped red pepper
1/2 cup chopped green pepper
4 teaspoons cornstarch, mixed with 4 teaspoons water
1 cup canned pineapple chunks, drained with 1/2 cup reserved juice
3 tablespoons brown sugar
3 tablespoons rice wine vinegar
1/4 cup chicken stock

Directions:

In a large skillet, heat the oil over medium high heat. Season chicken with salt and pepper and cook in the oil until browned. Set the chicken aside on a paper towel lined plate to absorb the extra oil. Using the same pan, add the red and green peppers and cook for 2-3 minutes (you want them to still have a bite to them, don’t overcook them). Stir in the pineapple chunks, juice, sugar, vinegar and chicken stock and bring to a simmer. Simmer until sauce begins to reduce (warning: this can take a good 15 minutes or so – it’s important to reduce the liquid because it’ll prevent your dish from being too soupy!) Stir in the cornstarch mixture and bring the liquid to a simmer. Stir in the chicken and cook for about 5 minutes. Serve over rice or just as is.


Pictures:


Friday, August 19, 2011

Farfalle Carbonara


A few years ago Zach and I traveled to Greece for a dream vacation! It had been somewhere we had wanted to go before we settled down and had kids - and had come highly recommended by a gal pal of mine. During our two weeks there I swear I ate so much food it was amazing. By far my favorite dish was the spaghetti carbonara -  surprising since it's not exactly Greek lol but it was phenomenal. Ever since I've wanted to make this recipe at home but excuse after excuse got in my way and I just never got around to it - until tonight!!! And let me just tell you it was freaking AMAZING! I actually doubled the recipe (the regular recipe yields a serving of 8, fyi) and took it to the Landstuhl Fisher House to donate it to the families staying there this evening. It was my good deed for the week and I sure hope that they liked it - it was everything I could do not to keep a serving or two selfishly for Zach and myself haha. Ok enough hype about this amazing dish...here it is!

Recipe:


1 pound of farfalle (or whatever noodle you fancy)
1 tablespoon olive oil
8 slices bacon, diced
1 tablespoon olive oil
1 onion, chopped
3 cloves of garlic, minced
1/4 cup dry white wine (I didn’t use it but you totally can)
4 eggs
3/4 cup grated Parmesan cheese
1 pinch salt and black pepper to taste
2 tablespoons chopped fresh parsley (optional)
2 tablespoons grated Parmesan cheese

Directions:

In a large pot of boiling salted water, cook the pasta until al dente. Drain well. Toss with 1 tablespoon of olive oil, and set aside.

Meanwhile in a large skillet, cook chopped bacon until slightly crisp; remove and drain onto paper towels. (Once the bacon cools, chop it up into quarter inch chunks). Reserve 2 tablespoons of bacon fat and add the remaining 1 tablespoon olive oil, and heat in reused large skillet. Add the chopped onion and cook over medium heat until the onion is translucent. Add in the minced garlic, and cook 3 minutes more. (Add wine if you’d like and cook one more minute.)

Return the cooked bacon to pan with the garlic and onions; add the cooked and drained pasta. Toss to coat and heat through, adding more olive oil if it seems dry or is sticking together. Add in thebeaten eggs and cook, tossing constantly with tongs or large fork until eggs are barely set. Quickly add 3/4 cup Parmesan cheese, and toss again. Add salt and pepper to taste (remember that bacon and Parmesan are very salty).

Serve immediately with chopped parsley sprinkled on top, and extra Parmesan cheese at table.

It is so phenomenal! I promise!

Pictures:

Onions, Garlic, and Bacon...I swear I could have just eaten this w/o the pasta!

Voila! As you can see my pot is wayyy to small for this - gotta love German cooking spaces!

Ready for delivery to the LMRC Fisher House!

Thursday, August 18, 2011

Spanish Rice

At the request of my husband, I have made this recipe several times in the past 3 weeks! It's super easy, incredibly flavorful, and so filling! It has basically become a weekly requirement in our house lol. It takes about an hour from start to finish but it's worth it! On nights like tonight, where I am utterly exhausted, a quick 15 minute prep for dinner (the rest of the time it's just simmering on low heat) is absolutely fabulous! And with that, here we go...

Recipe:

1 tablespoon olive oil
1 lb ground beef
3 teaspoons sat
2 celery ribs, diced
1 medium onion, diced
½ green bell pepper, seeded and diced
2 cups chicken broth
1 1/2 cups of water
1 14 oz can tomato puree
1 ½ cups uncooked rice
1 teaspoon sugar
2 teaspoons Tabasco or other hot sauce

Directions –
Heat the olive oil in a large skillet over high heat. Cook the beef in the skillet and season it with ½ teaspoon of the salt until it's brown. Transfer the beef to a paper towel-lined plate to drain.

Reduce the heat of the pan to medium-high and pour off all but about 2 tablespoons of the drippings from the skillet. Sauté the diced celery, onion, and bell pepper in the skillet for about 10 minutes, or until tender. Add the browned beef, chicken broth, water, tomato puree, rice, sugar, remaining salt, and the Tabasco and bring to a boil.

Reduce the heat to medium-low and cook, covered for about 30-40 minutes or until the rice is tender.

Pictures:


So Delightful!!!

Tuesday, August 16, 2011

Egg Fried Rice with Veggies

I have been contemplating this recipe for ages it seems. Once upon a time, long, long ago I attempted this and it was a MAJOR FAIL - in my defense I tend to get over-analytical about stuff and I think I just got so nervous about messing it up that it became my destiny to fail that time. Tonight was different though, I just went off the top of my head! To be honest the only thing I know about egg fried rice is that it is the absolute  best part about Chinese take out or Hibachi! It has onions and garlic, tons of salty soy sauce (yum), peas and corn. (Ok, most places have to put that dreadful carrot in there but hello, totally NOT happening in my recipe - but feel free to add it to yours if you one of those carrot lovers.) Basically from here I totally just made it up, but it was incredible, despite not owning a wok lol.

Recipe:


2 tablespoons vegetable oil
1 small onion - diced
4 cloves of garlic - minced
4 eggs
1 1/2 cups of peas
1 1/2 cups of corn
4 cups cooked white rice
4 tablespoons soy sauce
garlic salt, sea salt and pepper to taste

Directions:

In a wok (preferably) or a large frying pan, heat the oil over medium high heat. Saute the onions until translucent. Add the garlic and cook for about 3 minutes (the garlic will be lightly browned). Add the eggs and scramble the ingredients until the eggs look to be fully cooked (not runny anymore) and season with salt and pepper. Throw the peas and corn (and carrot if you must) into the mix and stir. I used frozen veggies so I let them heat up for about 5 minutes and then added the rice. Reduce the heat to medium low and cover - stirring occasionally so that the rice doesn't burn. Add additional soy sauce or seasoning if you'd like, personally I can't get enough garlic salt so I threw in an extra dash at the end. Serve piping hot!!! (I also cooked some teriyaki chicken on the side for a little meat but the dish is fabulous without it too!)

Pictures:


Sunday, August 14, 2011

Boston Clam Chowder

YUM! So yesterday morning I was trying to think of fabulous recipes that I haven't made in a while and that I would be totally looking forward to devouring throughout the week. Zach mentioned chowder and it dawned on me that it has been wayyy too long since we enjoyed a good bowl of homemade chowder. Also, since discovering the recipe for dutch oven bread I've just been craving a good soup or stew so when Zach mentioned it I didn't even have to think - YES, SOLD!

As far as the recipe goes, Zach took me to Boston years ago for an anniversary and we came across this cute little tile that had the recipe for basic Boston Clam Chowder. Of course we have tweaked it a bit because we really enjoy hearty soup so without further ado - let's cook!

Recipe:


1 pint of clams
1 cup chopped bacon (about 12 strips, cooked and chopped)
1 medium onion, diced
1 cup of clam liquor (you can just save the juice from the canned clams or buy clam liquor separately)
3 large potatoes, diced into small cubes (I leave the skin on but you can take it off if you'd prefer)
1/2 teaspoon of salt
1/4 teaspoon of pepper
2 cups of whole milk

Directions:

In a large pan cook the bacon until slightly crispy and then set aside and chop up into 1/2 inch pieces. Drain most of the bacon grease out of the pan but leave a few tablespoons to cook the onion in. Saute the onion for about 3-5 minutes (depending how crunchy or cooked you like them) and then add in the clam liquor, clams, potatoes, salt and pepper. Cook for about 15 minutes, or until the potatoes are tender. Add the milk and then bring to a low boil. Let it set for about 5 minutes and then serve it up with some delicious bread.

Pictures:


It turned out soooo delicious! It's not a thick soup but it's definitely hearty and filling! Of course I served it up with some of that delightful dutch oven bread that I seem to be addicted to these days. Hope you enjoy it as much as we did!!!

Saturday, August 13, 2011

Blueberry Zucchini Bread

So I saw this recipe last week and had to re-read the title - why in the world would anyone mix blueberries with zucchini for any reason? But as I tucked the recipe away in my 'junk' folder it kept taunting me throughout the week. I can't really explain it, but it just seemed like I should at least TRY it before writing it off as totally ridiculous. I mean after all, I love blueberries and I love zucchini and well I love bread so somebody somewhere might be on to something.

I will tell you this, from the moment I started to mix the batter together I could see how this recipe could be legit. And then when I pulled it out of the oven I nearly fainted at the sight and smell of it all - my entire house smells of sweet blueberries - Glade doesn't have a thing on me! I promise you this recipe is so delightful - and again has fruit and vegetables in it so it can't be too terrible for you, right :)

Recipe:


3 eggs, lightly beaten
1 cup vegetable oil
3 teaspoons vanilla extract
2 1/4 cups white sugar
2 cups shredded zucchini (about 1 ½ zucchini, peeled and grated – I used a large holed cheese grater)
3 cups all-purpose flour
1 teaspoon salt
2 teaspoons baking powder
3/4 teaspoons baking soda
1 teaspoon ground cinnamon
1 pint of fresh blueberries (or a bag of frozen blueberries if you can’t buy fresh)

Directions:

Preheat your oven to 350 degrees F (175 degrees C). Lightly grease 4 mini-loaf pans – or two large regular sized loaf pans.

In a large bowl, beat together the eggs, oil, vanilla, and sugar. Fold in the zucchini. Beat in the flour, salt, baking powder, baking soda, and cinnamon. Gently fold in the blueberries. Transfer to the prepared loaf pans. Bake for 50 minutes in the preheated oven, or until a knife inserted in the center of a loaf comes out clean. Cool 20 minutes in pans, then turn out onto wire racks to cool completely.

Pictures:
Shredded Zucchini


It looked so cute, I had to take it's picture :)

Golden perfection!!!

YUMMY!
Honestly, this was a great recipe! I was so pleasantly surprised - it was super moist, the blueberries were the perfect compliment to the sweet bread and I couldn't help but plate up 2 slices! Also, I was wishing I had a huge spoonful of cool whip on top...next time!